FAQ-ID:1151
The HR tool serves as the most integral part of WorkDo! Its settings are connected to employees’ daily clock-ins/outs, leave applications, overtime applications, and various eForm approval flows.
There are 6 important steps that you need to follow, so please follow the instructions below to properly set up HR.
│ HR is key to improving yor team’s workflow │
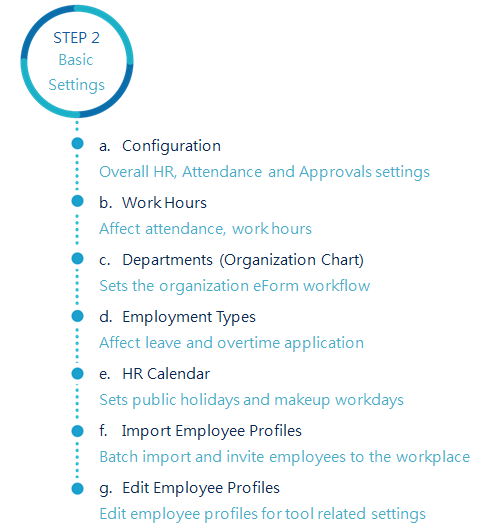
Please make sure that you have first followed basic setup done in Start WorkDo in 5 Steps to find the settings of the picrure below.
│ Read HR Tool Manual │
If you have the HR Staff tool role, then you may follow the steps below and use the web version of WorkDo to set up HR!
6 Important Settings in HR
STEP 1 │ Work Hours
Your workplace’s work hours directly influence the team’s workdays, clock in/out times, flexible work times, etc. You can use the default work hours or you can create multiple work hours for different teams. Your call!
If you need to use the Attendance tool for employee clock in/out, please activate it first to for the related clock time settings to be available here.
STEP 2 │ Departments
Departments settings dictate how eForms are passed and signed. Properly set up your organization’s hierarchy and the employee requests will follow the set flow and get to the right person to be signed.
- Trial Period: We recommend you invite 1 to 3 people to help you test out the request flow, each with a different role and title.
- Adoption: Invite the rest of the teammates to join the workplace and assign them with the right roles and titles.
STEP 3 │ Employment Type
By default, WorkDo has 3 employment types, you can create, deactivate, or change them as you see fit. The employment type will affect certain tool privileges, ie, who are allowed to apply for overtime and how many leave days they are entitled to have each month/year. So don’t forget!
STEP 4 │ HR Calendar Management
Non-working days such as the federal holidays, special company events are set with the HR Calendar. A workplace’s HR calendar will determine whether employees are able to apply for leaves, overtime, or clock in/out normally.
A workplace is allowed to use multiple HR calendars for different teams, so you don’t worry about managing remote teams in different countries!
STEP 5 │ System Settings
The most important setting in the System Settings is that you don’t have to manually set each new employee is required to clock in/out. However, this function is not retroactive, meaning it only applies to new employees after the setting has changed.
You can always go to the Attendance tool and individually change this setting if you want, but if your workplace doesn’t require employees to clock in/out, you can bypass this step.
STEP 6 │ Import Employee Profiles
The aforementioned 5 steps are for the HR personnel to manage each employee, and each employee’s profile can be updated anytime. But to make life simpler, you can also batch import employee profiles by using WorkDo’s template file. This can drastically reduce the amount of time spent on profile setting and it’s the quickest way to get your workplace up and running!
 Reminders
- Only members with the HR Staff tool role are allowed manage the workplace and employee settings instead of the workplace admins. This is an added layer of security, and in most cases, company HRs are not always in charge of maintaining the entire workplace.
- These 6 important settings are crucial to connecting to advanced tools like Attendacen, Leave, Leave pro and Overtime, so be sure to complete them before using these tools.
- Wanna know more HR details, say no more! The most comprehensive HR Tool Manual is here!
Relevant Questions
HR Settings for New Employees
Problems importing employee profiles?
Why is there’s a member with two employee profiles?
What is the HR Calendar?
How do I create new departments in the organization?
Why do I have limited tool access?
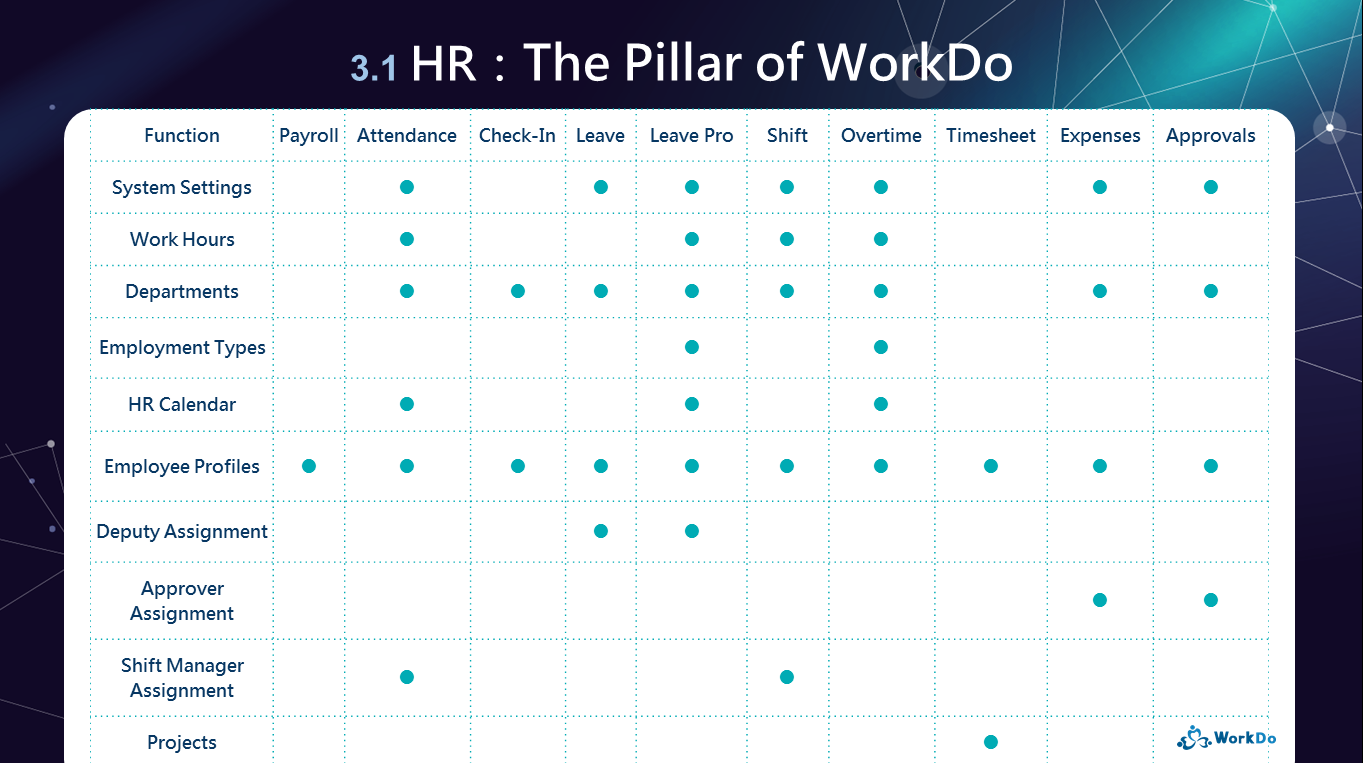
What are the HR tool features?
Understand your tool role and what it does.